4. Build Inventory Application
4.1. Overview
This documents explains how to build Nordmart's Inventory Microservice.
4.2. Application Building
Follow the guidelines given below to build Inventory microservice (opens new window).
4.2.1. Clone github repository
cd ..
git clone https://github.com/stakater-lab/stakater-nordmart-inventory
1
2
2
and switch directory directory
cd stakater-nordmart-inventory/
1
4.2.2. Find out which region is associated with the container registry `cr`
ibmcloud cr region
1
This will provide output like this:
You are targeting region 'us-south', the registry is 'us.icr.io'.

OK
1
2
3
2
3
Note the registry URL i.e. us.icr.io
4.2.3. Add a unique namespace for your cr, This name has nothing to do with the namespace name you set for Openshift.
ibmcloud cr namespace-add <NAMESPACE_NAME> -g bootcamp
1
4.2.3.1 Build application using Dockerfile provided in the repository.
REGISTRY_URL is the same noted in 4.2.2 NAMESPACE_NAME is the namespace you added in 4.2.3 IMAGE_NAME is the name of image you want to set so inventory IMAGE_TAG is the version of the image, e.g. 1.0
ibmcloud cr build --tag <REGISTRY_URL>/<NAMESPACE_NAME>/inventory:1.0 -f DockerfilePipeline .
1
4.2.3.2 List built images
ibmcloud cr image-list
1
4.3. View Image
To view images from dashboard follow the guidelines
NOTE
Make sure you are logged in on the IBM Cloud dashboard from your own user
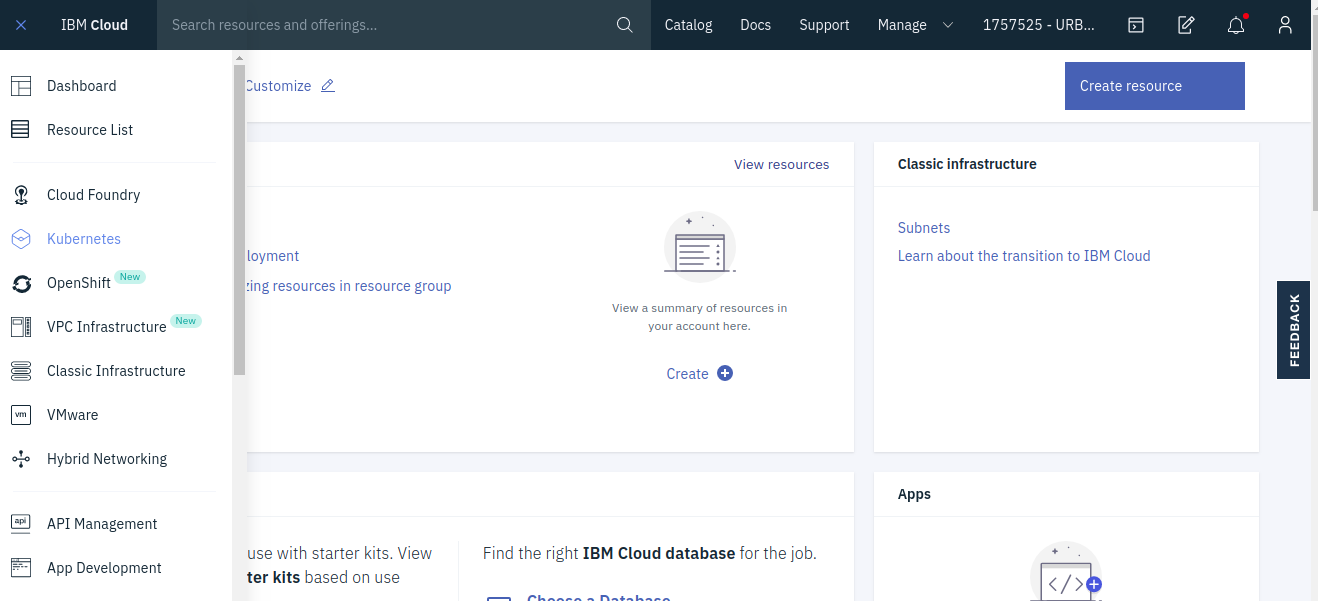
4.3.1 IBM Cloud dashboard, select "Kubernetes" from the left panel
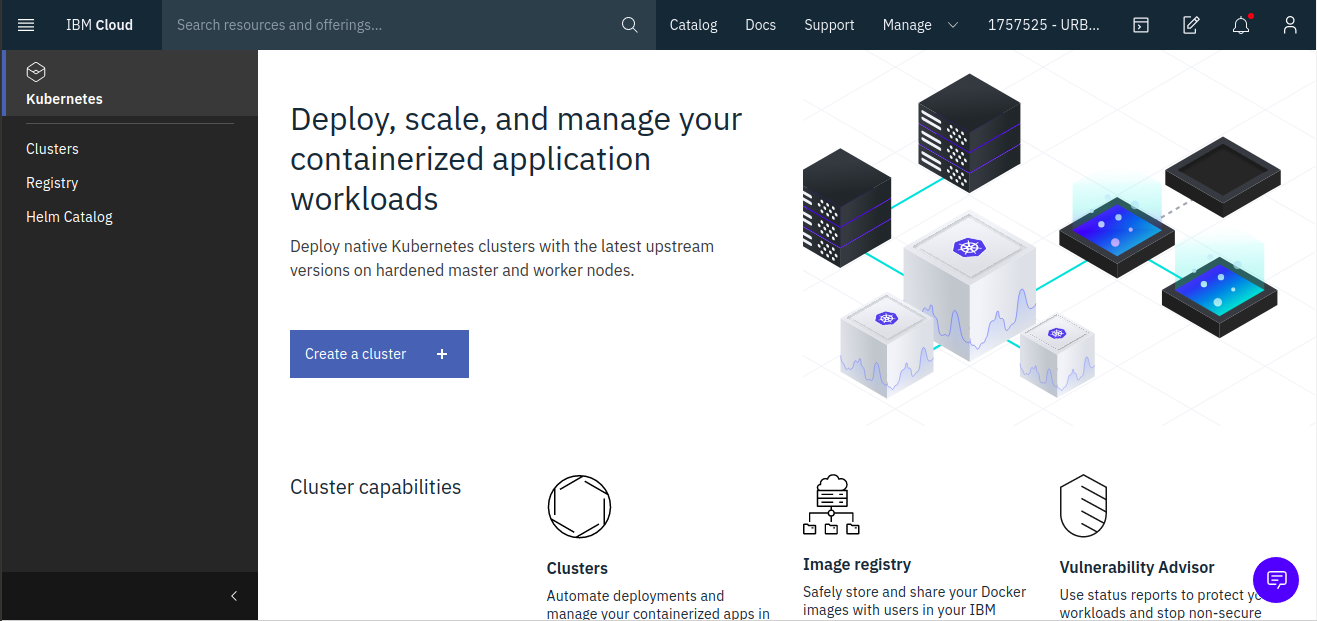
4.3.2 Select "Registry" from the left panel
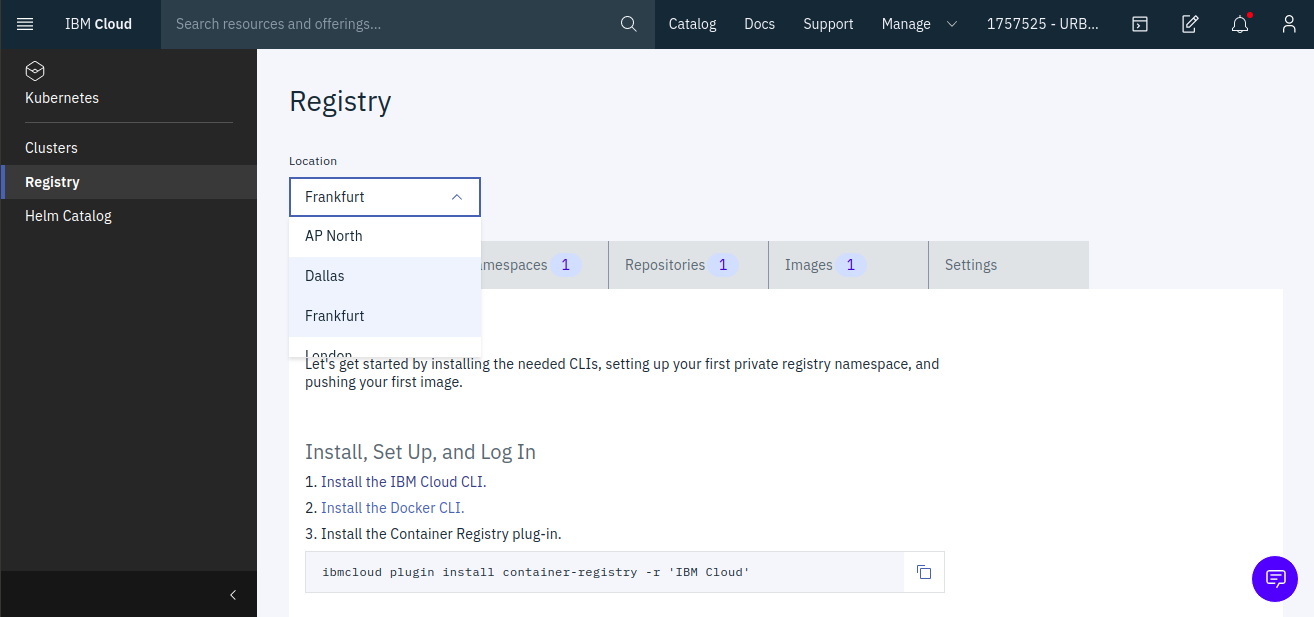
4.3.3 Select the region choosed during login process
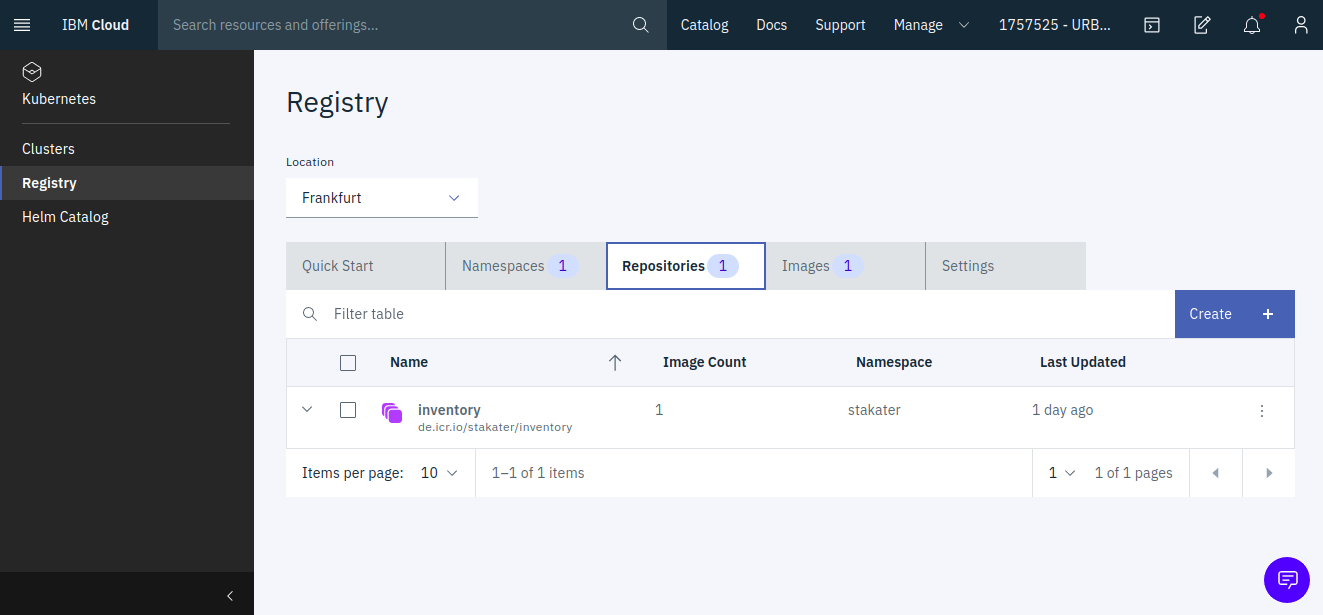
4.3.4 Now `Namespace`, `Repository` and `Images` tabs will be available.
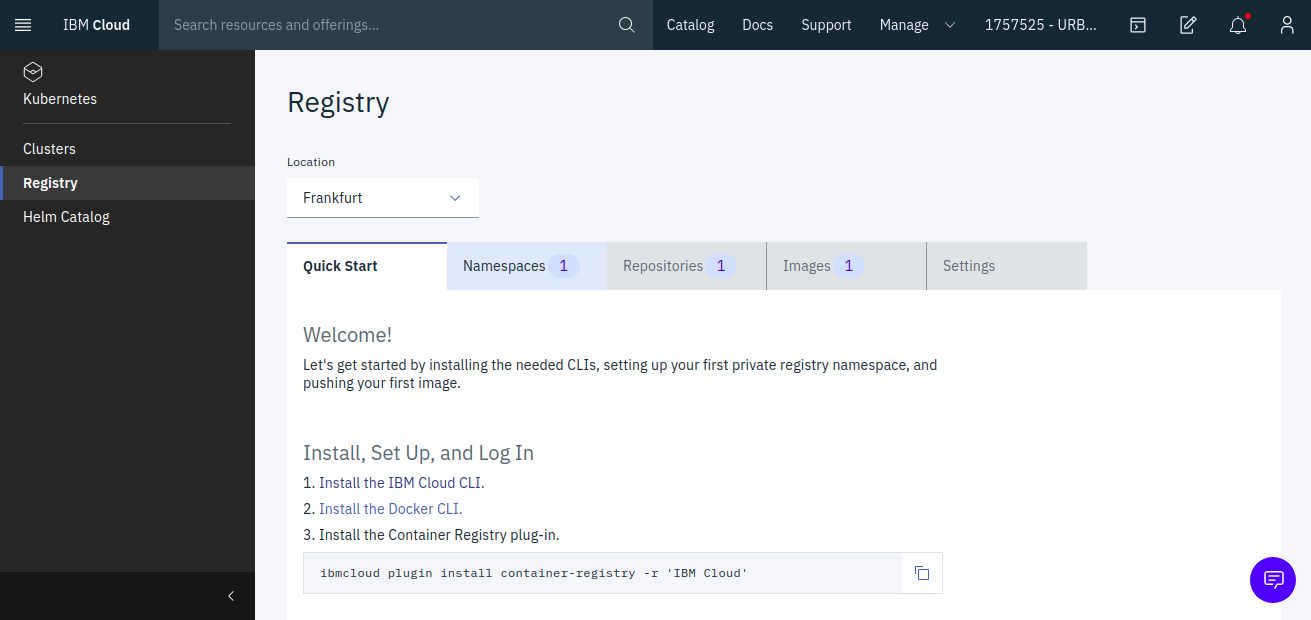
4.3.5 Select the `Repository` tab, it should show you the images you pushed earlier
